-
React-native 모달 만들기 - 로그인 및 유저 정보 화면React Native 2024. 12. 22. 17:47
개발 환경 세팅이 모두 완료 후 실행하면 EXPO에서 생성된 애플리케이션이 실행되었다.
이번 시간에는 WONDER WEEKS에서 아이 이름과, 생년 월일(태어난날)을 입력하는 모달을 만들어 보자.

React Native modal 분석하기
앱은 대부분의 기능들이 규격화되어있다는 점을 알면, 아마도 modal도 공홈에서 제공하고 있진 않을까? 하는 마음에 찾아보았다.
https://docs.expo.dev/router/advanced/modals/
Modals
Learn how to use modals in Expo Router.
docs.expo.dev
놀랍게도 모달을 만드는 방식에 대해 세밀하게 나와다는 점을 알 수 있다.
React Native modal 분석한 내용 실행하기
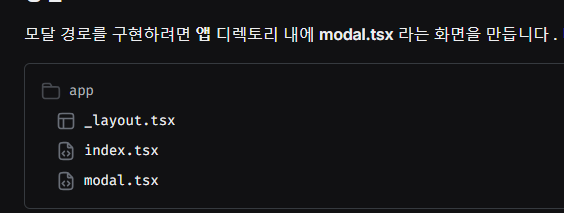
1. 화면 만들기
modal.tsx라는 화면을 만들라고 한다. 필자의 경우 userInputModal.tsx로 생성했다.
import { Button, StyleSheet, Text, TextInput, TouchableOpacity, View } from 'react-native';

export default function userInputModal() {

    const handlePress = () => {
        console.log('press')
    }
    return <View style={styles.container}>
        <View style={styles.form}>
            <Text style={styles.label} > 아이 이름  </Text>
            <TextInput style={styles.input} placeholder='기본 아이'></TextInput>

            <Text style={styles.label}> 태어난날  </Text>
            <TextInput style={styles.input} placeholder='2024-11-11'></TextInput>

        </View>
        <TouchableOpacity style={styles.button} onPress={handlePress}>
            <Text style={styles.buttonText}>입력완료 </Text>
        </TouchableOpacity>


    </View>
}

const styles = StyleSheet.create({
    container : {
        flex: 1,
        alignItems: 'center',
        justifyContent: 'space-between', // 상단과 하단 분리
        backgroundColor: '#fff',
        padding: 20,
    },
    content : {
        flexDirection: 'row',
        justifyContent: 'space-around'
    },
    form : {
        width: '90%',
    },
    label : {
        fontWeight: "500",
        fontSize: 20,
        marginTop: 10,
    },
    input : {
        borderColor: '#ddd',
        borderWidth: 1,
        borderRadius: 10,
        margin: 10,
    },
    button: {
        backgroundColor: '#ff3a67', // 버튼 배경색 ff3a67
        padding: 10,
        borderRadius: 5,
        width: '85%',
        alignItems: 'center',
    },
    buttonText: {
        color: 'white', // 버튼 텍스트 색상
        fontSize: 16,
        fontWeight: 'bold',
    },
})
2. app/_layout.tsx에 option : modal로 설정하기
모달로 표시하려면 Stack에 넣고 option으로 presentation: "modal"로 설정하면 된다.
import { DarkTheme, DefaultTheme, ThemeProvider } from '@react-navigation/native';
import { useFonts } from 'expo-font';
import { Stack } from 'expo-router';
import * as SplashScreen from 'expo-splash-screen';
import { StatusBar } from 'expo-status-bar';
import { useEffect } from 'react';
import 'react-native-reanimated';

import { useColorScheme } from '@/hooks/useColorScheme';

// Prevent the splash screen from auto-hiding before asset loading is complete.
SplashScreen.preventAutoHideAsync();

export default function RootLayout() {
  const colorScheme = useColorScheme();
  const [loaded] = useFonts({
    SpaceMono: require('../assets/fonts/SpaceMono-Regular.ttf'),
  });

  useEffect(() => {
    if (loaded) {
      SplashScreen.hideAsync();
    }
  }, [loaded]);

  if (!loaded) {
    return null;
  }

  return (
    <ThemeProvider value={colorScheme === 'dark' ? DefaultTheme : DefaultTheme}>
      <Stack>
        <Stack.Screen name="index" />
        <Stack.Screen name="userInputModal" options={{
          presentation: "modal",
          title: '아이 정보 입력'
        }}/>
        <Stack.Screen name="+not-found" />
      </Stack>
      <StatusBar style="auto" />
    </ThemeProvider>
  );
}
3. 작업 확인하기
Home 화면에서 버튼을 클릭하면 모달을 실행하여 정상 동작하는지 확인하자.
모달을 실행하는 방식은 router.push로 실행할 수 있다.
import { router } from "expo-router";
import { Button, Text, View } from "react-native";

export default function Home(){
  const handleModalButton = () => {
    router.push('/userInputModal')  // 모달 화면으로 이동하기
  }

  return <View>
    <Text>Home </Text>
    <Button title="모달" onPress={handleModalButton}></Button>
  </View>
}
정리
- Modal을 만드는 방식은 Stack Component에서 option을 Modal로 세팅
- Modal을 확인하는 방법은 expo-router의 router.push로 창을 띄어줌
마무리
- Modal이라는 페이지가를 추가한다는 개념으로 접근한다면 이해가 훨씬 쉬움
728x90'React Native' 카테고리의 다른 글
React-native 생년월일 입력을 위한 DateTimePicker 추가하기 (0) 2024.12.25 React-native AsyncStorage로 로그인 정보 로컬에 저장하기 (0) 2024.12.25 React-native expo 로 wonder weeks 앱 만들기 - 환경 세팅 하기 (0) 2024.12.21 [리엑트 네이티브] React-Native-vector-icon (0) 2019.04.09 [리엑트 네이티브] Expo 기반 빌드 (0) 2019.02.07